
Drainage Problems in Your Yard? Here’s How to Fix Them Before It’s Too Late
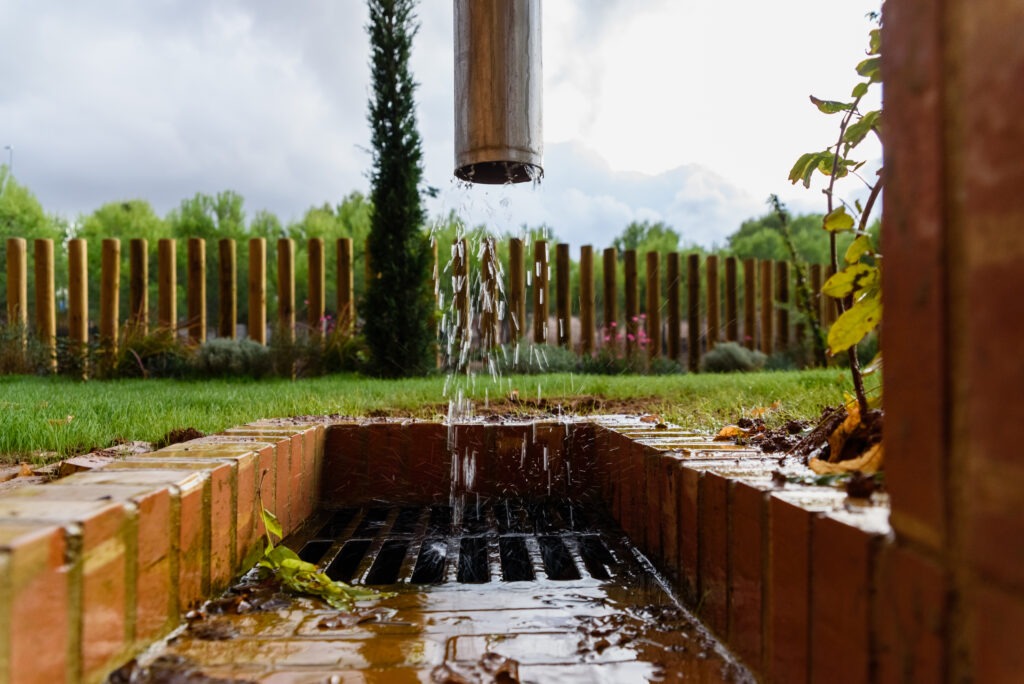
Excess water in your yard is more than just an inconvenience. It can cause serious damage to your landscaping, your home’s foundation, and even attract pests. Understanding the causes of poor drainage and knowing how to fix them can save you time, money, and a lot of headaches. In this guide, we’ll explore the most common drainage problems homeowners face and practical solutions to keep your yard dry and healthy. Why Is Yard Drainage So Important? Proper drainage prevents standing water that can kill grass, drown plants, erode soil, and cause water damage to your home’s foundation. A well-drained yard also reduces the risk of mold, mildew, and mosquito breeding. Common Signs of Drainage Problems Wondering if you have a drainage issue? Look for these telltale signs: If you spot any of these signs, it’s time to take action! What Causes Poor Drainage in Yards? Several factors can contribute to drainage problems, including: Understanding the root cause is the first step to finding the right solution. How to Fix Yard Drainage Problems Depending on the severity of the problem, there are several ways to improve drainage in your yard: 1. Regrade Your Yard A landscaping professional can adjust the slope of your yard so water flows away from your home. This is one of the most effective long-term solutions. 2. Install a French Drain A French drain is a gravel-filled trench with a perforated pipe that redirects water away from problem areas. It’s a popular choice for addressing standing water in low-lying spots. 3. Build a Dry Creek Bed A dry creek bed uses rocks and gravel to create a natural-looking drainage channel. It’s both functional and attractive, guiding water safely away from your yard. 4. Aerate and Amend Soil If your soil is compacted or clay-heavy, aerating and mixing in organic matter can improve absorption and reduce runoff. 5. Extend Downspouts Make sure your downspouts extend at least 6 to 10 feet away from your home’s foundation. This helps prevent water from pooling near the base of your house. What Not To Do Ignoring drainage problems can lead to costly repairs and long-term damage to your home and landscaping. By recognizing the signs and addressing them promptly, you’ll protect your property and keep your yard healthy for years to come. If you’re dealing with standing water or other drainage headaches, contact Mean Green Lawn & Landscape today for a personalized consultation and a yard you can be proud of. When to Call a Professional While some minor drainage issues can be solved with DIY solutions, more serious problems often require professional expertise. At Mean Green Lawn & Landscape, we specialize in diagnosing and fixing yard drainage problems of all sizes. Our team can design and install effective drainage systems tailored to your property’s unique needs.
Sod Installation Secrets: How to Get a Thick, Lush Lawn in Just 30 Days
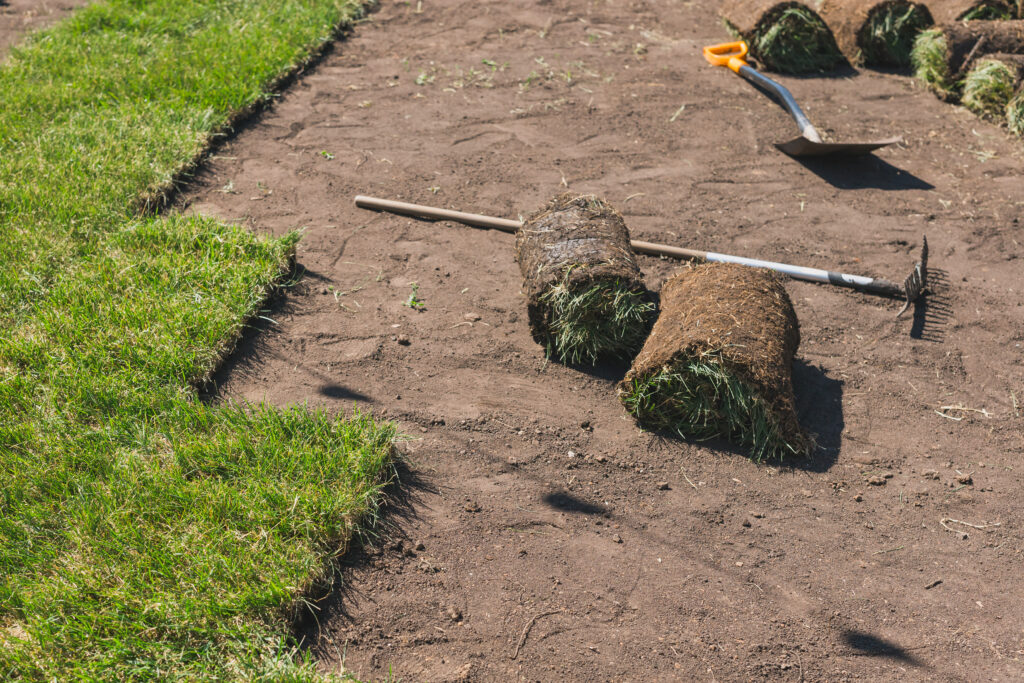
A beautiful, green lawn doesn’t have to take years to achieve. With the right sod installation techniques, you can transform your yard in as little as 30 days. Whether you’re tired of patchy grass or starting from scratch, this guide will show you how to get that thick, lush lawn you’ve always wanted. Why Choose Sod Instead of Seeding? Sod offers instant results. Instead of waiting months for grass seed to fill in, sod gives you a fully grown lawn from day one. It also prevents soil erosion and reduces weeds, making it an excellent choice for homeowners who want quick, professional-looking results. When to Install Sod The best time to install sod in Texas is during spring or early fall. These seasons provide optimal temperatures and moisture levels, allowing the roots to establish quickly. Avoid laying sod during the hottest part of summer, as it can dry out and struggle to take root. Step-by-Step Sod Installation Process 1. Prepare the Soil Start by removing existing grass, weeds, and debris. Use a rototiller to loosen the soil and create a smooth surface. Adding compost or topsoil improves nutrient content and drainage. 2. Grade the Area Make sure your yard is graded so water drains away from your home. This prevents pooling and promotes even growth. 3. Level and Firm the Soil Use a rake to level the soil, then lightly water it and pack it down with a roller. This creates a stable base for your sod. 4. Lay the Sod Begin laying sod along a straight edge, such as a driveway or sidewalk. Stagger the seams like bricks to avoid creating visible lines. 5. Press the Seams Gently press the seams together to avoid gaps. This helps the sod knit together faster and prevents weeds from taking root. 6. Water Immediately A properly functioning sprinkler system is essential for a successful sod installation. As soon as the sod is in place, give it a thorough soaking. Continue watering daily for the first two weeks, then gradually reduce to a regular schedule. How to Care for New Sod Watering Schedule Mowing Wait until the grass reaches about 3 inches tall before mowing. Never cut more than one-third of the grass height in a single mowing session. Fertilizing Apply a balanced fertilizer after the sod has been established for at least four weeks. This encourages deep roots and a healthy lawn. Common Mistakes to Avoid When to Call a Professional While some homeowners tackle sod installation themselves, hiring a professional ensures the job is done right the first time. At Mean Green Lawn & Landscape, we handle every step; from soil prep to watering schedule, so you can enjoy a beautiful, green lawn without the guesswork. Final Thoughts Installing sod is one of the fastest ways to get a lush, green lawn. By following these steps and avoiding common mistakes, you can enjoy a thick, healthy yard in just 30 days. Ready to transform your landscape? Contact Mean Green Lawn & Landscape today for a free sod installation estimate and let’s get started on the yard of your dreams.
