How to Identify and Treat Lawn Grubs: A Homeowner’s Guide to a Healthy Yard

Lawn grubs can wreck your grass faster than you think, leaving behind brown patches that just won’t heal. If you’ve noticed your lawn looking tired or uneven, chances are you’re dealing with these hidden pests. Knowing how to identify grubs early and the signs of grubs in lawn can save you a lot of trouble. We’ll walk you through simple grub treatment steps that really work. Keep reading to protect your yard and prevent grub infestation before it’s too late. Identifying Lawn Grubs Spotting lawn grubs early can save your grass from major damage. These pests work underground, making them tricky to catch before they cause visible harm to your yard. Recognizing Grub Damage Brown patches that appear suddenly in your otherwise green lawn are the first red flag. These spots feel spongy when you walk on them, unlike dry patches from lack of water. If you can easily pull up sections of grass like a loose carpet, grubs have likely eaten through the root system. The damaged areas form irregular shapes and grow larger over time, especially during late summer and early fall. Another telling sign is increased animal activity. Raccoons, skunks, and birds will dig into your lawn hunting for these protein-rich snacks. Small holes and torn-up grass sections often mean animals are searching for grubs in your yard. Water won’t fix these damaged areas. Even with extra watering, grub-damaged grass continues to wilt and die because the roots are gone. This key difference helps separate grub issues from other lawn problems. How to Identify Grubs Lawn grubs are small, C-shaped creatures with cream-colored bodies and brown heads. They measure about ¼ to 1 inch long, depending on their stage of growth. To check for grubs, cut a 1-square-foot section of turf about 2-4 inches deep in a damaged area. Peel back the grass and look through the soil. Count how many grubs you find – 5-10 grubs per square foot indicates a problem that needs treatment. Grubs are the larvae of beetles, most commonly Japanese beetles, June beetles, or European chafers. Each type looks slightly different, but all cause similar damage. Japanese beetle grubs have a distinctive pattern of tiny hairs on their rear ends forming a “V” shape. Most homeowners spot grubs during spring or fall lawn work. The best time to look is when they’re feeding near the surface – typically early fall and spring. During winter and mid-summer, they burrow deeper, making detection harder. Signs of Grubs in Lawn Your grass will tell you when grubs are feeding below. Watch for grass that turns yellow then brown during late summer, even with proper watering and care. The soil beneath grub-damaged areas feels soft and spongy because the root system is gone. Push a screwdriver into these areas – if it slides in with almost no resistance, grubs might be the cause. In severe cases, you can roll up the dead turf like a carpet since nothing anchors it to the soil. Birds, especially crows and starlings, pecking repeatedly in the same lawn areas suggest grubs below. Similarly, moles, skunks, and raccoons dig small holes or tear up patches of grass hunting for these tasty morsels. Their sudden interest in your yard often means grubs have moved in. Timing matters too. Grub damage typically appears in late summer through fall, and again in spring. If your lawn showed no problems during spring but develops dead patches by August or September, grubs are likely the culprit. This pattern matches their feeding cycle as described by lawn care experts. When to Treat Lawn Grubs Timing is everything when fighting lawn grubs. The best window for treatment falls between mid-summer and early fall when grubs are young, small, and near the soil surface. July through September offers your best chance for success. During this period, newly hatched grubs feed actively near the grass roots and haven’t yet developed resistance to treatments. They’re smaller, more vulnerable, and easier to kill with less chemical input. Spring treatments work less effectively because the grubs are larger and tougher. By spring, they’ve already done most of their damage from the previous year. While you can still treat them, you’ll need stronger products and may see less impressive results. The actual number of grubs matters too. Finding 5-10 grubs per square foot warrants treatment. Fewer than that might not cause noticeable damage, while more indicates a severe infestation needing immediate attention. Weather conditions affect treatment success. Apply products when soil is moist but not saturated, and when rain is expected within 24 hours after application. This helps move the treatment down to where grubs feed without washing it away completely. Treating Grub Infestations Once you’ve confirmed grubs in your lawn, quick action prevents further damage. The right treatment approach depends on the severity of your infestation and your preferences for chemical versus natural solutions. Effective Grub Treatment Methods Chemical grub killers offer fast, reliable results when applied correctly. Products containing carbaryl, imidacloprid, or chlorantraniliprole target grubs at different life stages. Preventive treatments work best when applied before eggs hatch in early summer. These products create a barrier that kills newly hatched grubs before they damage roots. Apply them in May or June, water them in thoroughly, and they’ll protect your lawn for months. Curative treatments tackle existing infestations. These fast-acting solutions kill grubs within days but don’t last as long as preventive options. Apply them when you spot damage and water the lawn immediately after application to help the product reach the soil where grubs feed. Proper application makes a huge difference. Always follow label instructions for the correct amount per square foot. Too little won’t kill the grubs, while too much wastes money and may harm beneficial insects. Water the lawn after application with at least ½ inch of water to move the product into the soil. For severe infestations, professional pest management services may offer the most effective solution. They have access to commercial-grade products and equipment that ensure even
The Ultimate Guide to Sod Installation in North Texas: Tips for Homeowners

The guide provides tips for sod installation in North Texas, covering timing, tool requirements, soil preparation, and sod selection for sun and shade. It emphasizes post-installation care and offers professional assistance.
Identifying and Managing Brown Patch, Spider Mites, and Chinch Bugs in St. Augustine and Zoysia Lawns

Tips for managing brown patch, spider mites, and chinch bugs in St. Augustine and Zoysia lawns. Includes identification, treatment, and preventive measures for maintaining healthy lawns.
From Brown to Green: Advanced Soil Health Strategies for Vibrant Texas Lawns

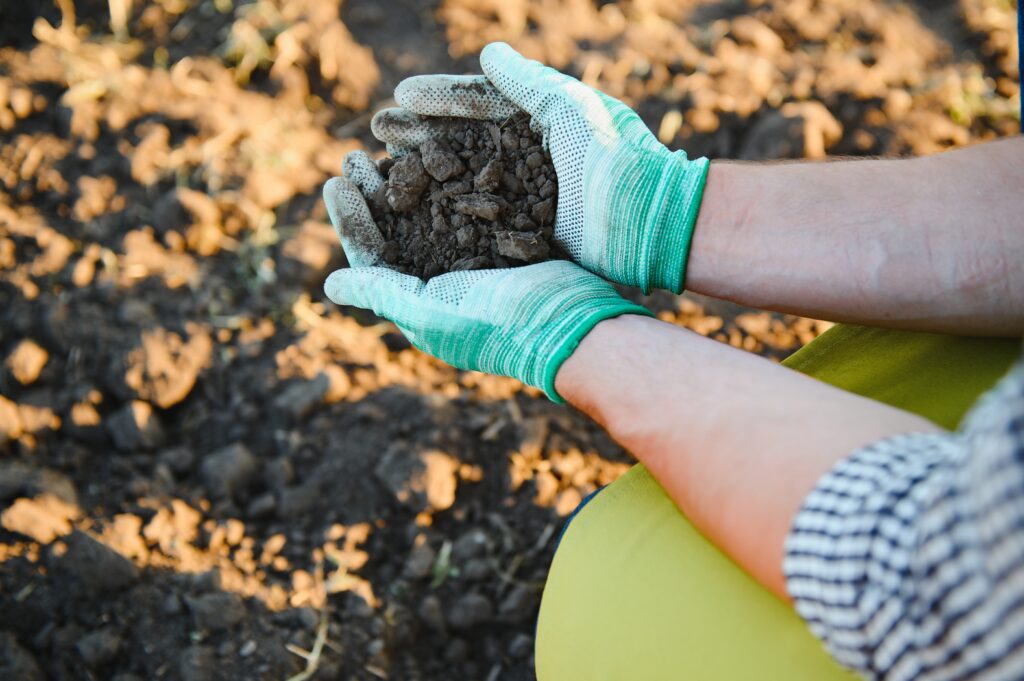
In the heart of Texas, where the summers are scorching and the clay-heavy soil is notoriously difficult to work with, maintaining a lush, green lawn can seem like an uphill battle. At Mean Green Lawn and Landscape, we understand that a vibrant lawn doesn’t start with just water and sunlight—it begins with healthy, nutrient-rich soil. In this blog, we’ll explore advanced soil health strategies tailored for Texas lawns, helping you turn brown patches into a green oasis. Whether you’re a DIY enthusiast or seeking professional help, these 7 tips will guide you every step of the way. 1. The Hidden Life Beneath Your Lawn Healthy soil is alive with microbes, fungi, and other microorganisms that work together to nourish your grass. Without these key players, your lawn might look good temporarily, but it won’t thrive long-term. The Role of Microbes in Soil Health Microbes break down organic matter into nutrients your grass can absorb. When soil lacks microbial diversity, nutrient uptake decreases, leading to stunted grass growth. Fungi: The Unsung Heroes Mycorrhizal fungi form symbiotic relationships with grass roots, expanding the root system and improving water and nutrient absorption. Learn more about the benefits of natural fertilizers on our lawn care services page. 2. Testing Your Soil: The Foundation of Success The secret to transforming your lawn starts with understanding what’s happening below the surface. Soil testing reveals pH levels, nutrient deficiencies, and more. DIY vs. Professional Testing Pro Tip: Conduct soil tests at least once a year, ideally in the early spring, to identify and address problems before the growing season. Interpreting Results 3. Aeration: The Secret Weapon for Texas Clay Soil One of the biggest challenges in Texas is dealing with compacted clay soil. Without proper aeration, water and nutrients struggle to penetrate the soil, leaving your lawn thirsty and malnourished. Mechanical Aeration Traditional core aeration involves pulling small plugs of soil from your lawn, creating pathways for air, water, and nutrients to reach the roots. Liquid Aeration: The Modern Alternative For a less invasive approach, liquid aeration uses surfactants to break up compacted soil. This method improves water infiltration without the need for machinery. 4. Compost: The All-Natural Lawn Booster Adding compost is one of the simplest and most effective ways to enrich your soil. It not only improves nutrient content but also enhances soil structure, making it easier for roots to grow. How to Incorporate Compost Compost Tea: A Liquid Miracle Compost tea is a nutrient-rich liquid made by steeping compost in water. It’s easy to apply and delivers a quick boost of nutrients to your lawn. Pro Tip: Use high-quality, locally sourced compost to ensure it’s free from contaminants or weed seeds. 5. Mulching: Nature’s Way of Protecting Your Lawn Mulching not only suppresses weeds but also retains moisture and gradually releases nutrients into the soil. Grass Clippings as Mulch After mowing, leave grass clippings on the lawn to decompose naturally. This method, called grasscycling, reduces the need for additional fertilizers. Wood Chips and Bark Mulch For garden beds or tree rings, organic mulches like wood chips provide long-lasting benefits, including weed suppression and soil insulation. 6. Advanced Soil Additives for Texas Lawns If your lawn is still struggling after implementing these basics, advanced soil amendments may be the answer. Gypsum Gypsum improves clay soil by breaking up compacted particles, enhancing drainage and root penetration. Humic Acid Derived from natural organic matter, humic acid boosts nutrient availability and promotes root growth. Worm Castings This supercharged organic material is packed with nutrients and beneficial microbes, making it a premium addition to any soil improvement plan. 7. When to Call in the Professionals Transforming your soil is a process that requires time and patience. While DIY efforts can yield significant improvements, professional help often accelerates results. At Mean Green Lawn and Landscape, we offer comprehensive soil health evaluations and personalized treatment plans. Our experts use state-of-the-art tools and techniques to revitalize your lawn from the ground up. Final Word A lush, green lawn in Texas isn’t just about watering or mowing, it’s about building a foundation of healthy soil. By understanding the science of soil health, testing your soil, and using advanced techniques like aeration and composting, you can transform your lawn into a vibrant outdoor space that thrives in even the toughest conditions. Ready to take the next step? Contact us at Mean Green Lawn and Landscape to schedule a soil health assessment and get your lawn on the path from brown to green.

